Characters
URL: app.vidvibe.io/characters
Characters are AI spokespersons that can appear in your videos -- talking heads, presenters, or brand ambassadors. The Characters page lets you browse, create, and manage your character library.
Page Layout
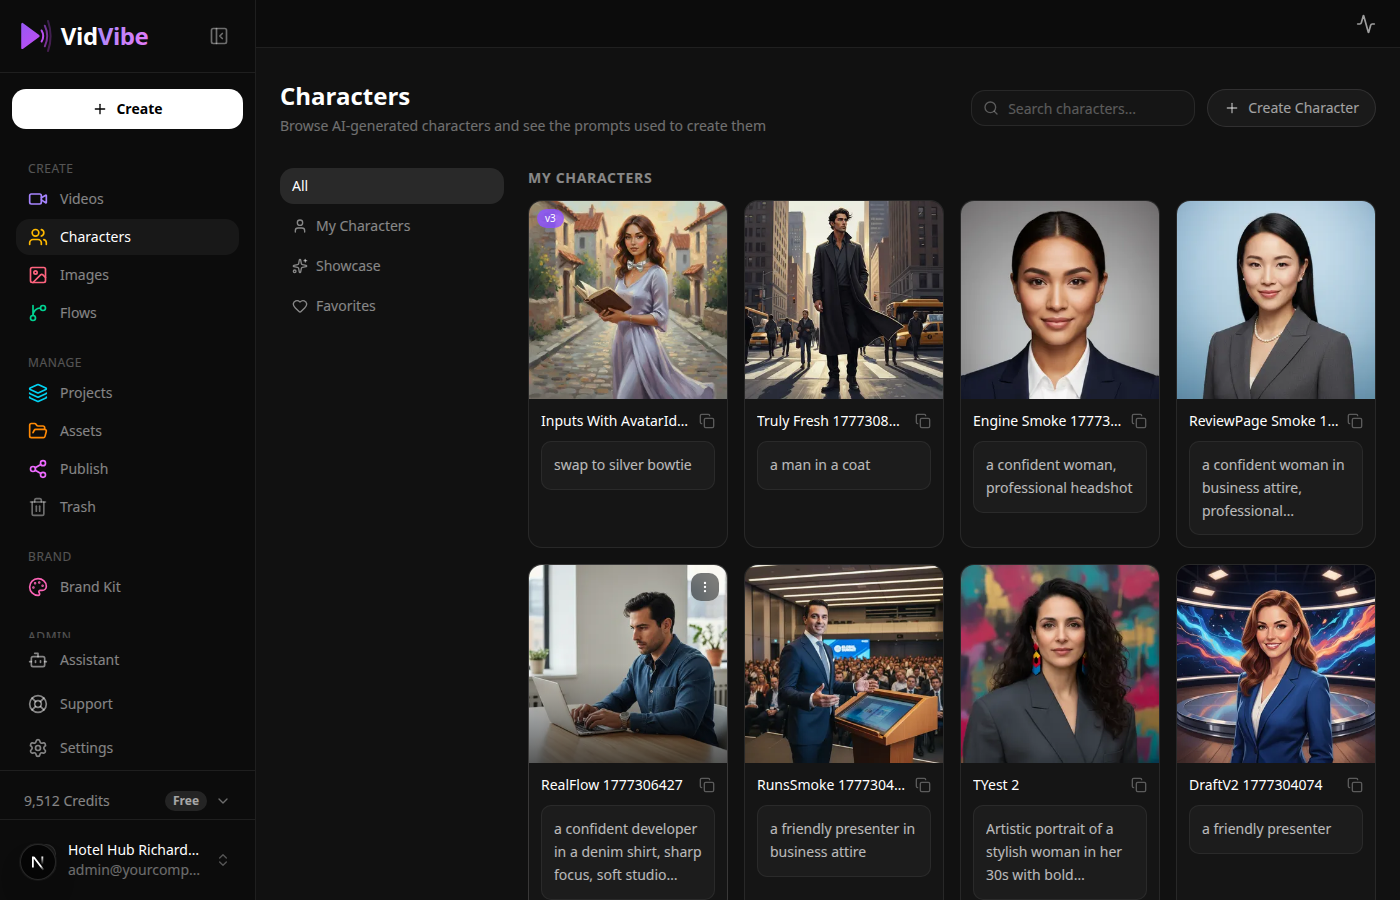
The page has sidebar tabs that filter what's shown in the grid: All, My Characters, Showcase, Favorites.
My Characters
Characters you created yourself -- either generated from a prompt or uploaded.
- Each card shows the character's thumbnail, name, and (if present) the prompt used to create or edit it.
- A v2 / v3 badge in the top-left appears if the character has multiple versions. See Character Versioning.
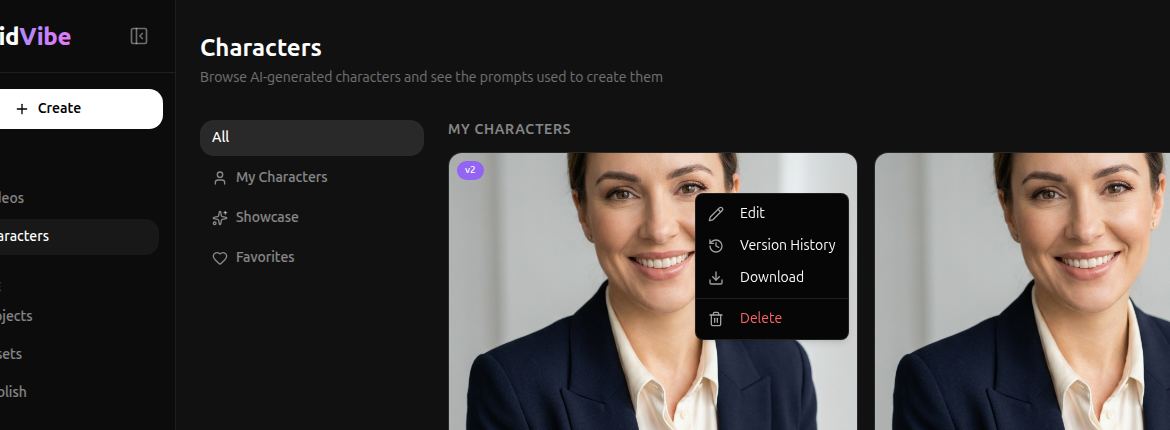
- The ⋯ (three-dot) menu exposes Edit, Version History, Download, and Delete. See Editing or Deleting a Character.
- Newly generated characters appear here immediately with a "Generating..." placeholder; they update to the finished image as soon as generation finishes.
Showcase
Pre-made example characters curated by VidVibe. Useful for two things:
- Use directly in flows. Pick a showcase character when a flow asks for one -- no need to generate your own first.
- Get inspiration. Click a card to open the full-view modal. The side panel shows the exact prompt that was used to create it, along with tags (e.g. Professional / Female / Corporate). Click Copy to grab the prompt, then open + Create Character, paste it into the Generate tab, and tweak -- a fast way to build your own variation of a look you like.
Showcase cards are read-only: they don't have the ⋯ menu (no Edit / Delete). Hover any card to reveal a heart icon for favoriting.
Favorites
Characters you've hearted show up here so you can find them again without scrolling the full Showcase list.
- Click the heart on any showcase card (or in the full-view panel) to favorite it; click again to unfavorite.
- The Favorites tab collects them in one place.
- Favoriting is just a bookmark -- it doesn't clone the character into My Characters. The card still points at the Showcase entry.
Creating a Character
Click + Create Character in the top-right corner. This now navigates to a dedicated create page at /characters/new (it used to be a modal). The page has two tabs at the top: Generate and Upload -- both produce a character that lands under My Characters.
The breadcrumb at the top of the page — Characters > Create — links back to the library.
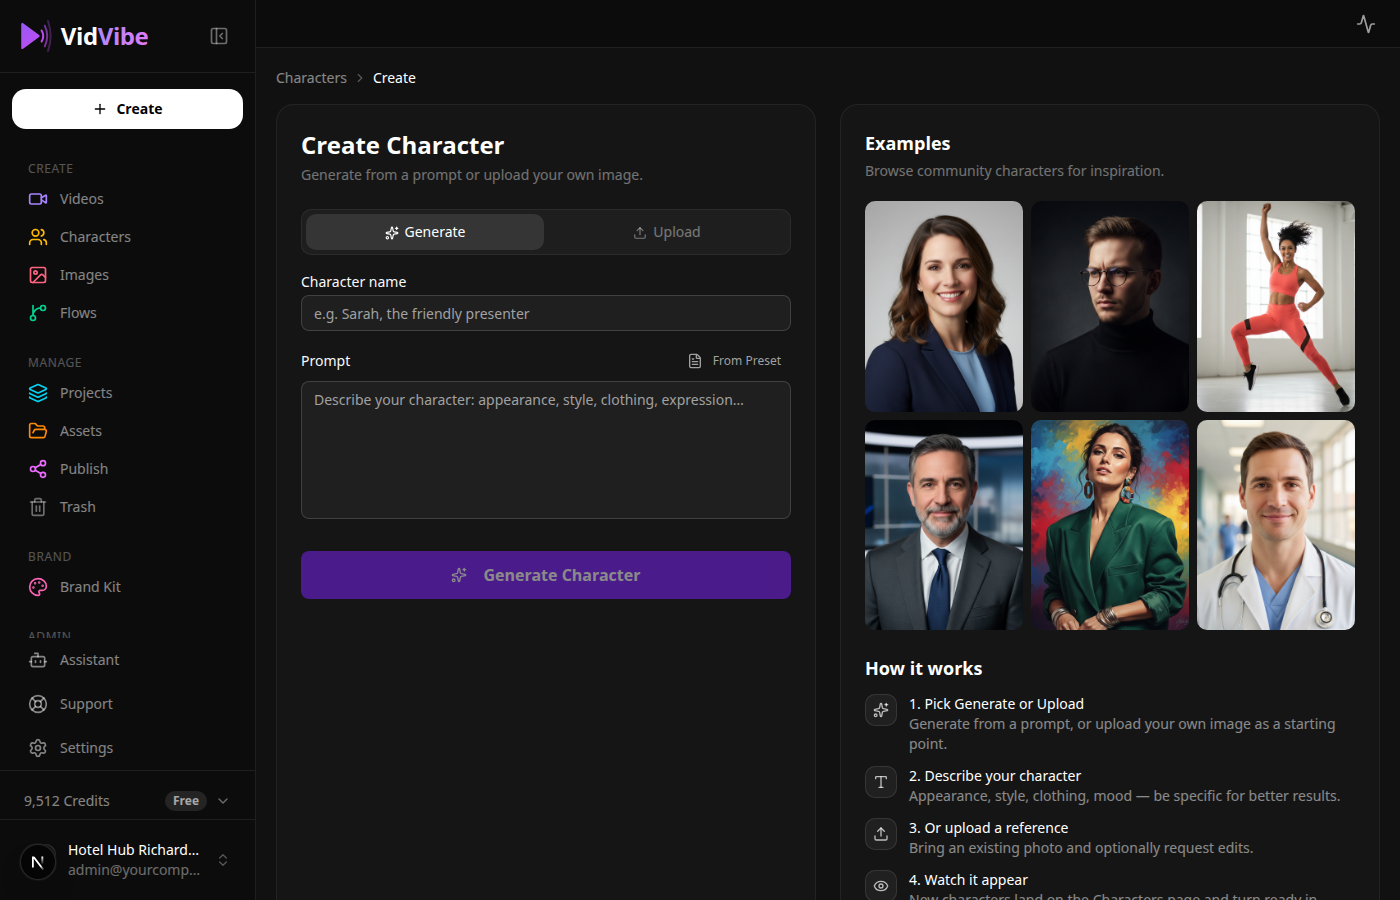
Generate from a prompt
The default tab. Describe your character with a text prompt and let AI create it.

- Character name -- a short label that shows up everywhere this character is referenced (e.g. "Kendra", "Tech Founder").
- Prompt -- describes appearance, style, clothing, and expression. Be specific about what matters and leave the rest open.
- From Preset -- pulls a saved prompt from your presets into the prompt box; tweak before generating.
- Click Generate to kick off the run. The new character appears under My Characters with a "Generating..." placeholder; it updates to the finished image when AI is done.
Upload an existing image
Switch to the Upload tab to use a photo or product shot you already have.
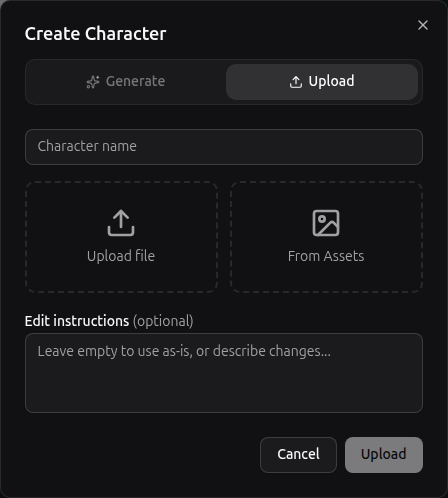
- Character name -- same as above.
- Upload file -- drag-drop or pick an image from your computer.
- From Assets -- pick an existing image from your library instead of re-uploading.
- Edit instructions (optional) -- if you fill this in, VidVibe will run an AI edit on the uploaded image first ("warmer lighting", "navy jacket", "remove background"). Leave it empty to use the image as-is.
- Click Upload to add the character.
Editing or Deleting a Character
Hover over any card in My Characters and click the ⋯ (three-dot) button in its top-right corner. A small menu opens next to the card:
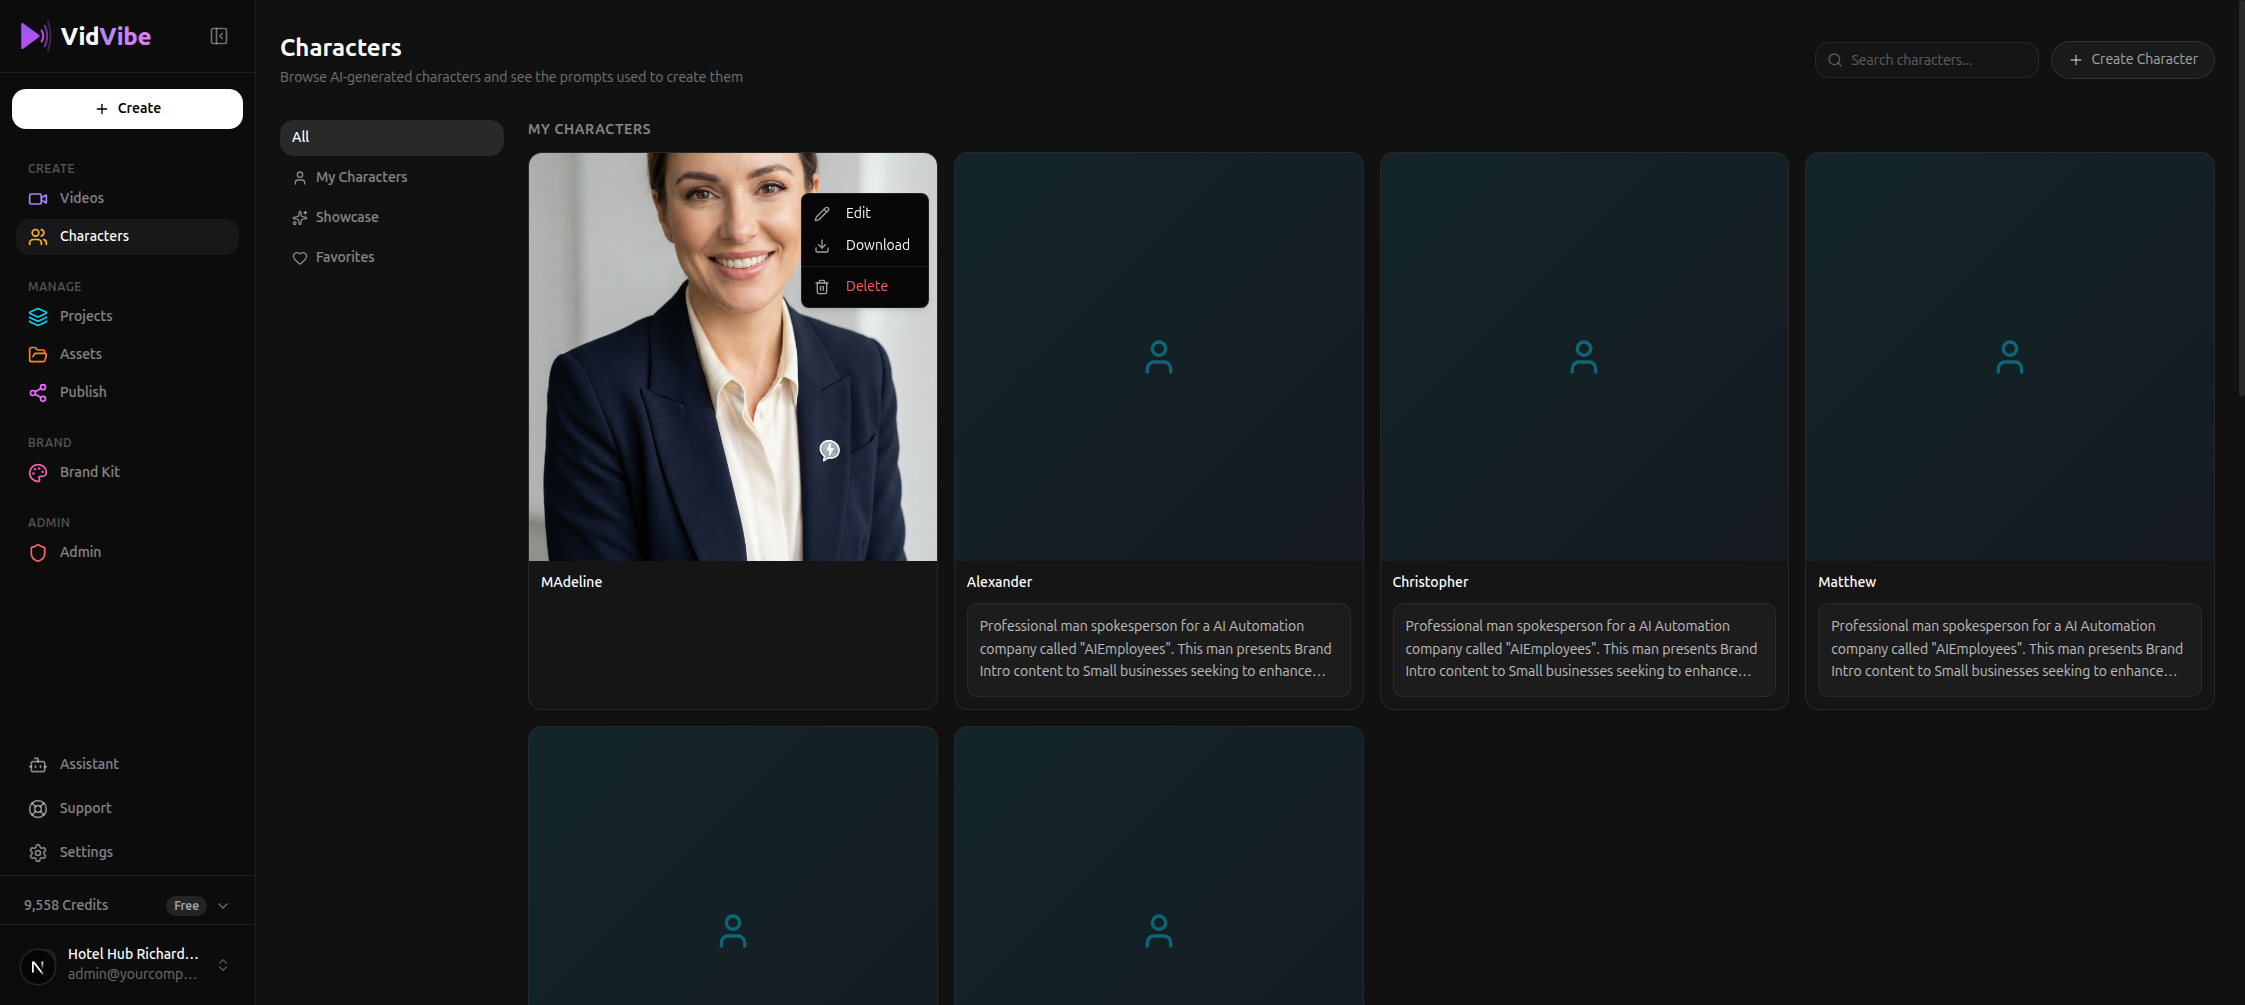
- Edit -- Opens a dedicated edit page at
/characters/<id>/edit(split-screen, same shape as Create). Tweak the name or give a new instruction ("make the jacket navy blue", "warmer lighting", etc.) and click Apply Edit. Each edit creates a new version -- the original is preserved (see below). - Version History -- Appears only on characters with more than one version. Opens the version panel where you can browse every version, preview them, and pick which one is active (the one used when this character is referenced from a flow).
- Download -- Save the current active image to your computer.
- Delete -- Permanently remove the character from your library. Videos you already generated with it aren't affected.
Only characters you created (or forked from the Showcase into My Characters) expose this menu. Showcase characters are read-only -- they don't have the menu.
Character Versioning
Every time you Edit a character, VidVibe generates a new version rather than overwriting the old one. This lets you iterate on a look without losing earlier drafts -- you can always go back.
The v2 / v3 badge
Versioned characters get a small v2, v3, … badge in the top-left corner of the card. The badge tells you how many versions exist (so v2 means two total, v3 means three, etc.). Single-version characters don't show a badge.
![]()
Opening Version History
The ⋯ menu on a versioned card grows an extra Version History entry (it doesn't appear on single-version cards):
The Version History panel
Click Version History to open the panel. Every version is listed in creation order with its thumbnail, timestamp, and the edit instruction that produced it. v1 is labeled Original; later versions show the instruction you typed when editing (e.g. "Warmer studio lighting, slight smile").
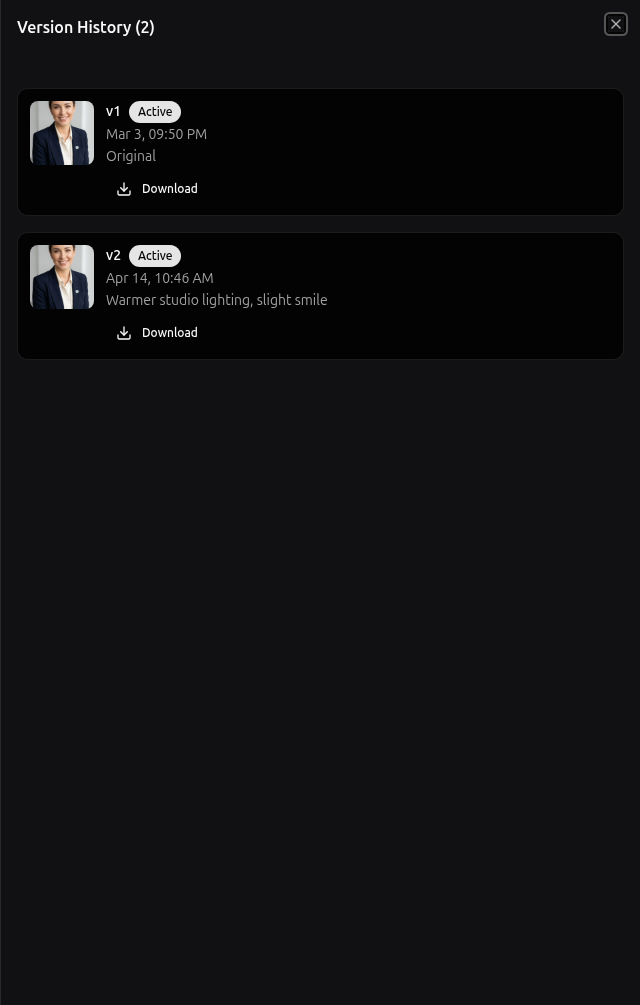
From this panel you can:
- Preview any version -- click the thumbnail to see it full-size.
- Set a different version active -- the active one is what flows pull when they reference the character by name, so a single click swaps the face everywhere without re-wiring any flow.
- Download a specific version's image.
- Delete a version you don't want to keep (the active version can't be deleted until another one is promoted).
Tip: because switching the active version doesn't change the character's name or ID, you can A/B a new look across existing flows by just flipping the version.
Using Characters in Videos
Characters are used in flows that include talking-head scenes. When you execute a flow that needs a character, you can select one from your library. The character will be animated with lip sync to match the generated voiceover.